| The following contains information on a character, area, item, or quest that is new to the latest version of Part One as of v1.40. |
| This article is part of a collection for the walkthrough for Part One. The previous article is Welcome Home. The next article is The Schism. |
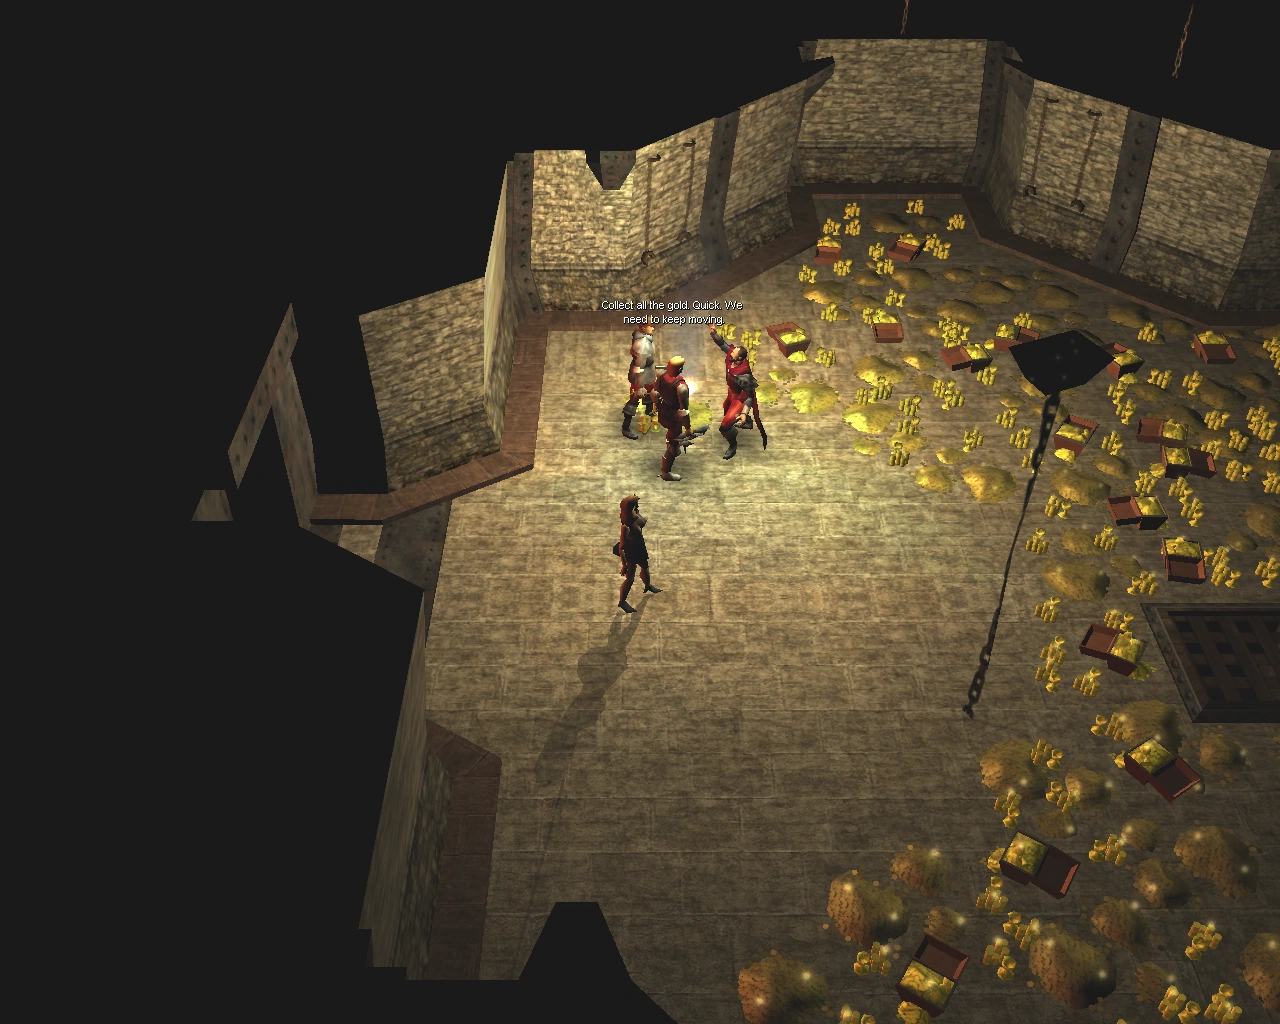
Piles of gold
After being captured at the Hunting Lodge, Simon Lyonson, Jero Fetton and Alen Kley offer the Princess a bargain to get away with her life and information about the whereabouts of Nathan and other captured members of The Family. Her part in the bargain is to aid the three Dhorn in raiding her father's stash, the King's treasure, which has become the object of a disagreement between the Dhorn military - whose claim on the treasure is based on their looting rights - and the Dhorn Empire - whose claim is that the undergrounds below the castle, where the treasure was located, are not part of the city of Betancuria and therefore, the King's treasure should go to the Empire.
The mission starts in some tunnels dug below Simon's house, in a conversation where the Princess has the opportunity to bargain for a small fee of her own rightful money and the desired information about the location where the Dhorn have taken Master Nathan and her friends.
Since they are to spend some time alone together, Simon Lyonson and the Princess will get to know each other a little better by the end of this quest. The Princess will also have the chance to hear the Dhorn side in the Betancuria - Dhorn war, will learn about plans Arto Benthur has for her.
|

Notes
- By the end of the quest it is revealed that Simon is a fourth son of Dhorn emperor. He doesn't like Arto Benthur and is fearfull that the Betancuria treasure will fall into wrong hands.
- During the quest current commander of Dhorn forces in Betancuria - Lord Mortenson, gets killed, and his place is taken, with the blessing of the Emperor, by Arto Benthur.
- The Princess learns that her identity as a Princess is known to Dhorn and that Arto Benthur wishes to marry her to strengthen his authority.
| Fix Me: any changes to the intro? |
Walkthrough[]
|
The Break In[]
Setting off from the tunnel
After the events in the Hunting Lodge and facing no other choice but to accompany Simon, Jero, and Alen on their mission, you're wrapped in a blanket, thrown on the back of a horse, and taken to the cellar in Simon's House. Simon goes over some last minute details with his men and you'll descend with the party into a tunnel below Simon's House. When you reach the bottom, it's revealed that you're going to be robbing the treasury in the Castle. The treasure was initially claimed by the Dhorn Emperor, but a technicality over the location of the vault resulted in a dispute over who owns it. Simon and company intend to steal the treasure before the Dhorn resolve the issue.
During the discussion on the details of the job, and as promised, Simon reveals that Master Nathan and other family members in the Bear Pit were taken to the Isle of Prisoners, a Dhorn prison located within the Lake of Sorrow, near a Dhorn city named Moonville. Before you can inform Alfons and your friends, you'll need to see this mission through.
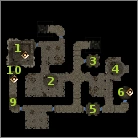
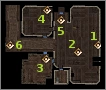
The tunnel leads to the cellars below the Dhorn Headquarters. Follow the path through the tunnels until you reach a small opening (#2), then crawl through. Make your way to the large area at the end of the tunnel (#4), where you'll be told that you must quietly break through the wall. Bash the boulder and enter the opening.
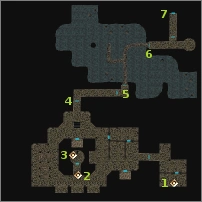
Before entering the cellars, Simon informed you that your initial goal is to lock the door at the base of the stairs and make it look like the lock is broken, which will keep the soldiers from being immediately alerted to something being wrong. If spotted, you should attack and kill any guards, but it should be possible to sneak through the hallway and close & lock the door near the stairs without issue. Your party should automatically enable stealth mode upon entering the cellars (#1) and you should do the same. You can ask them to stay behind or try to make it to the stairs with them. Open the door to your room and make your way west. Once the door at the base of the stairs (#2) has been locked, it's time to kill any and all witnesses as they're likely to discover the tunnel you came in. If you're still in stealth mode, it's time to show yourself and take care of the guards.
From here on, you'll have to keep an eye open for traps and Simon should say as much. Make your way through the door (#4) and follow the passage east. Beyond the first door at the end of the hallway (#5) is an Ochre Jelly. Be prepared for a quick fight, which will be followed by a conversation. Beyond the second door is a small bridge as well as a number of Jellys. Follow the bridge north east and through the door (#6), where you'll find a few more Jellys waiting. A Rusty Tower Shield and a Rusty Longsword can be found at the end of the hall, but the penalties won't make them worthwhile. Turn north and follow the passage down (#7) to the tunnel to the Castle.
The Treasure[]
Aside from the main gates, the tunnel is the only other known means of entering the Castle from the city. The tunnel is in very poor shape. It is not known if the King knew about it as it could have been used as a means of escape for him and his family. The tunnel leads directly into the Castle's basement and the treasure, so you're getting close. Simon has been through here before and he'll guide you. Aside from the door, there are still a few more traps between you and the treasure, but none in this area. Snake your way west through the corridors and take the stairs down (#2) to the basement.
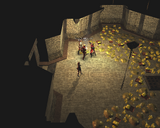
We're rich!
The basement may be in better shape than the tunnel you used to get there, but the dead bodies of Betancuria soldiers can be found everywhere, so it's not the most fun place to be. Once again, Simon will guide you. The small room to the south has a hidden door on the south west wall (#2). Step through it and make your way to the main chamber and turn south toward the locked door. Take care of the trap on the door and watch out for the trap beyond, then head down the stairs (#3).
As you enter the room you'll notice a red glowing door. This is all that stands in your way, but it's one door you won't be able to take care of as it has been magically warded. Fortunately Simon knows the password. A brief cutscene will play once you're inside and after just a few short minutes everone's bags are filled and you're ready to make your escape. Exit the vault, go up the stairs to the main basement, and head back toward the main chamber.

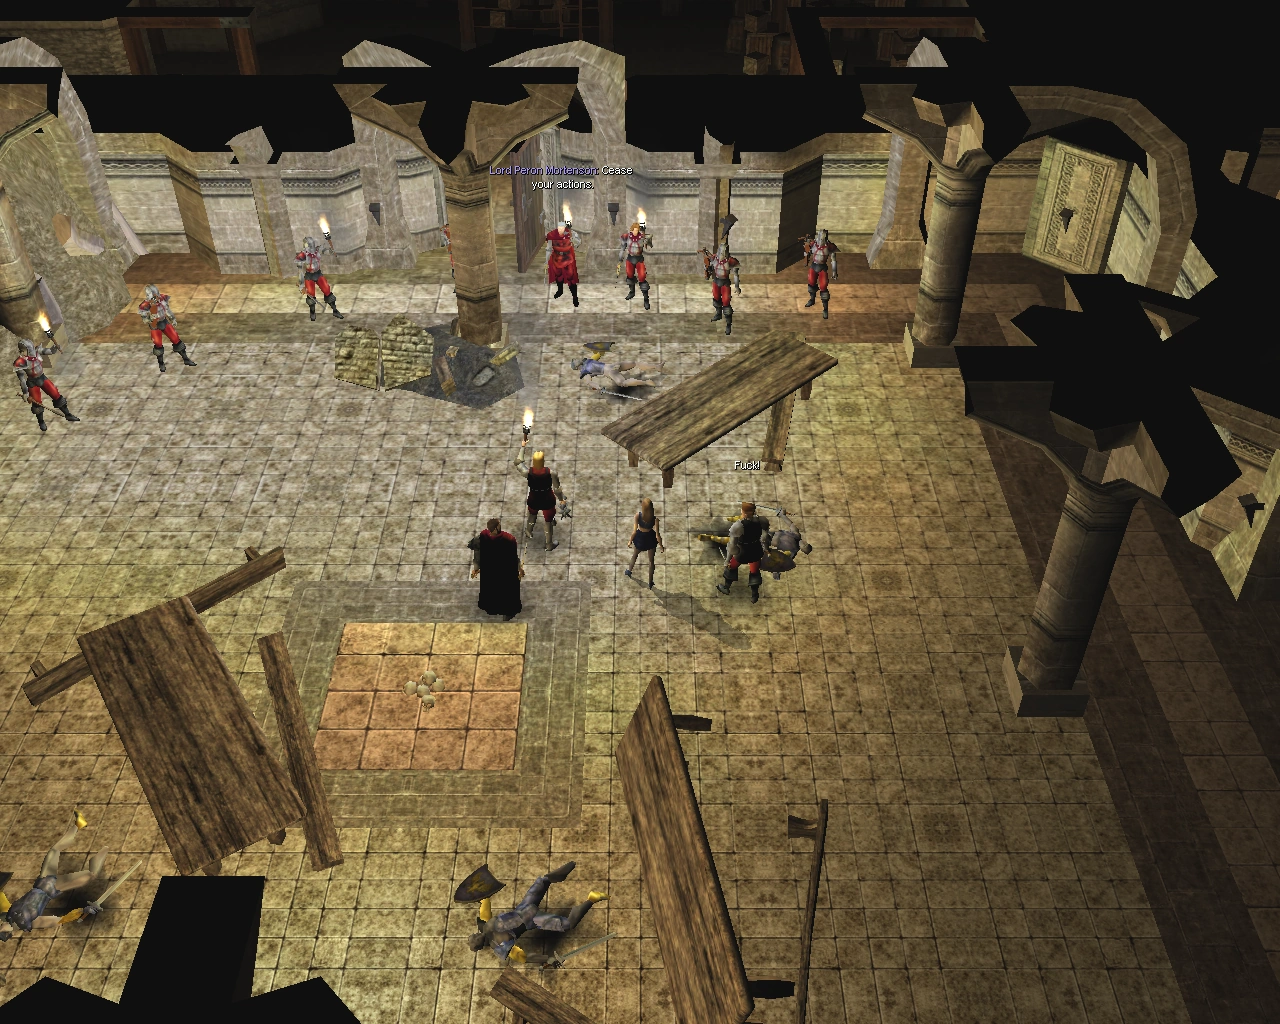
We're screwed!
Things have gone your way so far, but that's about to change. Once you near the main chamber, you and your party will be confronted by Lord Peron Mortenson, Arto Benthur, and a number of Dhorn archers. An argument between Simon and Lord Peron will play out where Simon explains that he'd rather Arto not be the one to get his hands on the gold. It appears that Simon has a better relationship with Peron than he does with Arto, but Peron has no choice but to take Simon in for crimes against the Dhorn empire. Alen is able to cast a basic fireball spell, which rips through some of the Dhorn, killing Peron instantly. As the archers let their arrows fly, Alen shouts for everyone to get back to the vault. You and Simon are the only ones that are able to make it though, as both Alen and Jero have been cut down in battle.
You're safe for now, but the vault door won't hold forever. Simon notices a grate in the vault floor, but it's far too small to escape through. He produces a polymorph self spell, which happens to turn the targets into mice. You'll cast the spell (during the dialog) and both of you are able to escape through the pipe into the caverns.
The Escape[]
Into the Caverns[]

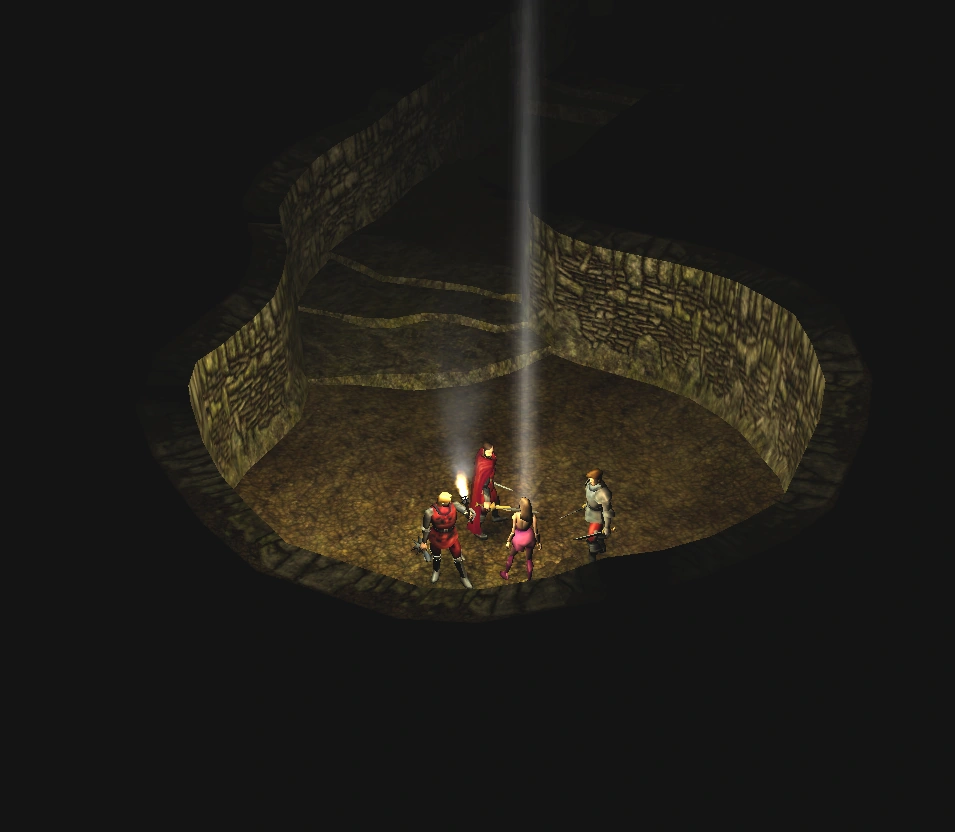
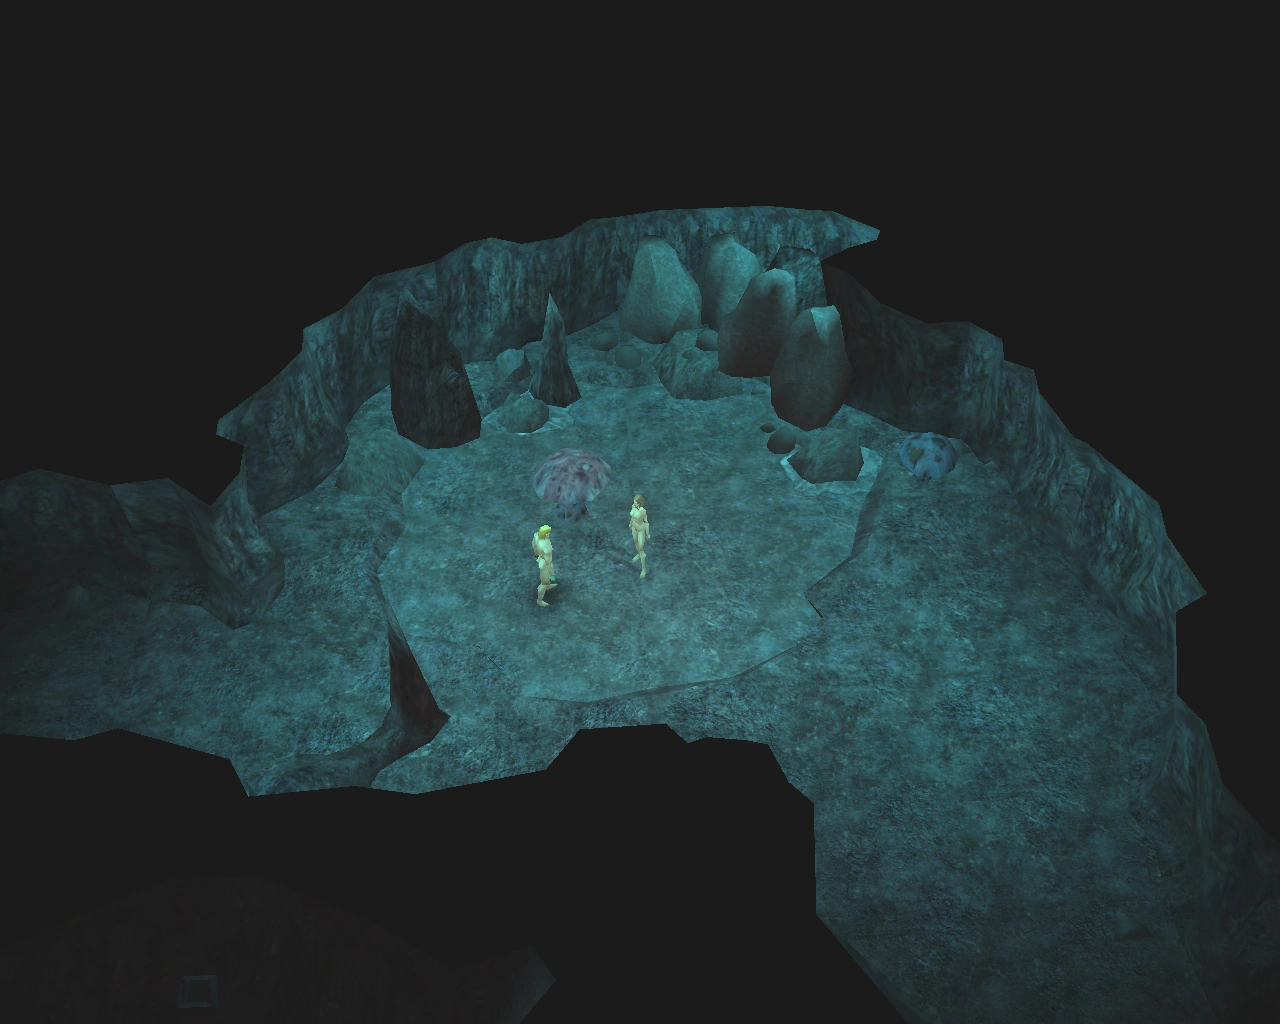
The caverns
You and Simon may have escaped through the grate in the vault floor, but it's left you with no clothes, very little equipment, and more importantly no gold. Everything is probably still in the vault and if Arto isn't able to open the warded door, you may be able to get it all back. There's also the the possibility of resurrecting both Alen and Jero, so long as their bodies haven't been too badly damaged. First things first, you need to find a way out of the caverns.
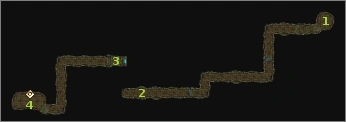
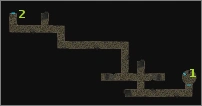
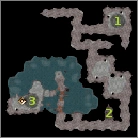
Follow the cavern to the south, through the mushroom grove. There are a few giant lizards gnawing on some mushrooms around the corner (#2), so you may want to enable stealth mode before you get down there and speak with Simon after you're well past them. Cross the stone walkway over the water and use the hoist (#3). It's a bit old and rickety looking, and slightly embarrassing to have someone right on your backside as you climb in the nude, but you'll be able to make it to the top in one piece. You exit through a small well-like opening in the basement of the Castle.
Lost in the Basement[]

The well
This isn't the same basement you saw during the initial part of the mission. This one is in extremely poor shape and it's infested with spiders, so many that it could be difficult to stealthily make your way around. Some rusty weapons can be found on this level, so you may want to avoid any fights until you can pick up something for both you and Simon. As you make your way through the basement, you'll encounter a few old crates with more or less useless looking items inside. Your initial reaction may be to ignore them, but it's absolutely critical that you locate these crates and take the equipment found within. In order to escape from the lower levels of the Castle, you'll need some Rope, a Spade, a Light Hammer, and some Pegs. If you make it to the cold caverns without the rope, the hammer, and the pegs, you'll end up backtracking later. It's probably best not to pick and choose, just take everything to be safe.
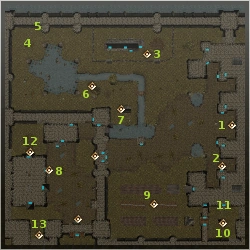
A number of giant spiders and spiderlings can be found on the other side of the door. The spiderlings won't pose much of a threat, but the giant spiders could be difficult especially if you're dealing with more than one at a time. Exit the room and turn south into the second open area. The first crate can be found here (#2), open it and take the rope. Now turn east toward the hallway. A corpse with a Rusty Dagger, a Composite Shortbow, and some arrows can be found in the small room to the north (#3). It may not be much, but it's better than nothing. A few more corpses can be found in the room to the south (#4). One has a Rusty Short Sword and the other (behind some webs) has a Rusty Two-handed Sword. The hallway to the south is obstructed by a few webs. Some rubble can be found to the west (#9), but you won't be able to do anything with it just yet. The inner chamber (#5) has the body of a dead castle guard, who has a Rusty Shield and a Rusty Longsword. You can break through the hallway or go through the spider-infested room just to the north and move toward the north east corner of the map, where you'll find a locked door and some stairs down (#6). Head downstairs.
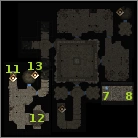
You'll immediately recognize this as the room where Vico took you on the night of the Dhorn invasion of the Castle. A conversation will follow. You can fill Simon in on the details or remain quiet and just listen to Simon's story about how he visited the Castle when you were an infant, and how the quest to expand Betancuria's territory lead to hostile relations with Dhorn. When the conversation is over, head to the far side of the room and check out the crate (#8). There's a spade, a Quarterstaff, and a hammer inside. You can take the quarterstaff if you like, but don't leave the spade or the hammer behind. Now return upstairs (#7) and make your way down the hallway to the rubble (#9). You should close the door behind you, as to avoid any hostile encounters with wandering spiders. Enjoy the show, then move down the cleared hallway to the stairs, unlock the door and head down (#10). There are spiderlings everywhere as well as a few giant spiders. There are two locked crates in the larger adjacent area (#12). One has some healing potions and the other has some pegs. Do what you like with the potions, but don't forget to take the pegs. Right around the corner from the stairs you came in on (#11) is a smaller circular room with some stairs down (#13) and a door leading to a hallway next to that. The hallway has collapsed and is impassible. Take the stairs down and you'll find yourself in a cold cavern.


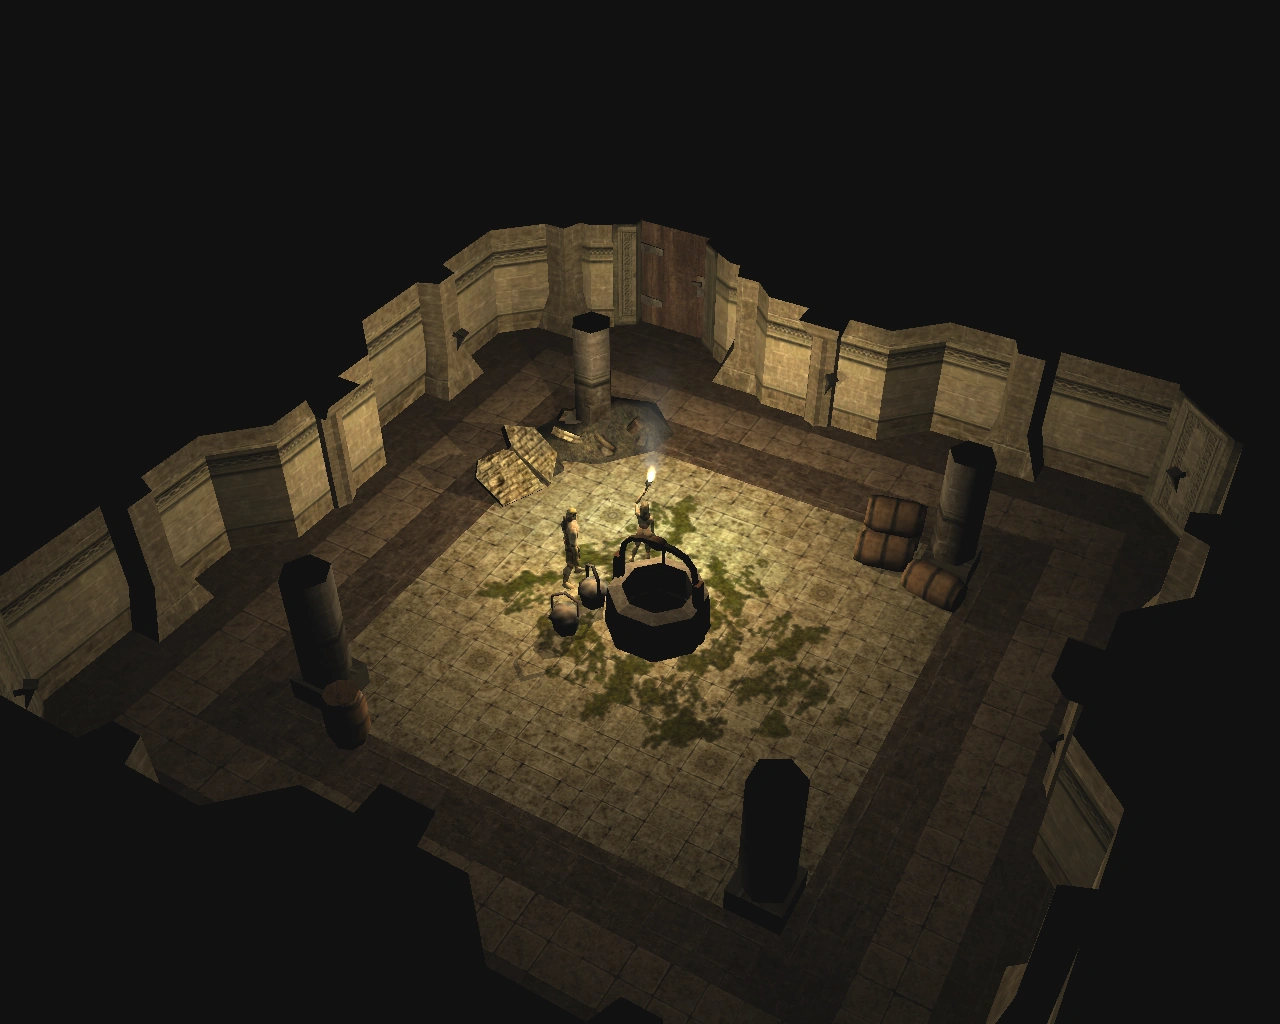
Brr!
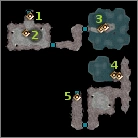
Follow the corridor east until you reach the stone path in the water. An exit on the path (#3) will trigger a dialog that mentions a small opening on the south wall of the cave that you can swim through. Once you make it to the other side (#4), you should enable stealth mode unless you want to do battle with a few more spiders. Head to the south west area of the room, bash the spider webs, unlock the door, and go down the stairs (#5).
You'll find yourself in a damp passage that leads to the bottom of a large well. The well leads up to the surface, but you'll need the rope, a hammer, and some pegs to climb to the top. The passage on the far side of the well triggers a dialog that takes you through the long, tedious climb. If you're missing any of this equipment, you won't be offered the option to climb and you'll need to return to the basement and locate the crates with any items you missed. When you reach the top you'll find yourself in a smaller (enclosed) courtyard-like area of the Castle.
Exploring the Castle[]

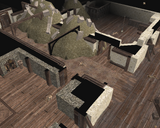
The kitchens
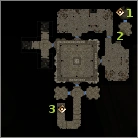
Out of the cold damp cave, and into the cold damp Betancurian weather. You won't be returning to the vault to pick up your things (we'll get to that later), instead just concentrate on finding a way through the castle and into the main courtyard so you can get beyond the castle walls and regroup with your friends. A quick conversation will follow the exit from the well. The nearby gate is rusted shut, so you'll have head up the stairs into the castle.
As soon as you enter the kitchens two guards will confront you. They initiate a conversation and say that Arto Benthur has ordered Simon's arrest. Try as he may, Simon won't be able to sway them. If you don't have any weapons equipped, you should do so before the conversation finishes. Before the guards strike, you can try to distract them briefly with your nude body, which will allow Simon to inflict some serious damage on one of the guards, making the fight a bit easier. When both are dead, you should check the bodies for weapons and armor. The Dhorn Mail is far too big for you, but Simon will be able to wear it. Simon mentions trying to find a way into the basement, but the passage down (#4) has collapsed. The exit is to the west, but you may want to stop by the upper floors (#5) first.
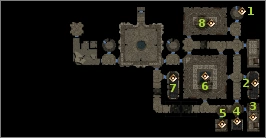
Simon will initiate a conversation at the top of the stairs, but there's guards everywhere so you should try to stay out of sight or close the door. The topic of marriage will come up during the discussion, and the possibility of you restoring the castle and you becoming queen. Simon even floats Lord Peron's name as a possible suitor (provided he can be resurrected), but there's no time to think about that now. The patrolling guards are thick, although you should be able to sneak through them. Enable stealth mode and head south, past the reading room (#2), toward the bedrooms. Your bedroom (#3) is the last door on the left. Once inside, Simon will ask you about it. Shira's body can be found here. Right around the corner is your dressing room (#4). The armoire has a skimpy black dress that was a gift from the Ambassador to Sargoza. Simon will have something to say if you put it on. The rest of the upper floor is just dead bodies, Dhorn soldiers, and caved in halls. Explore if you like, then return to the stairs (#1) and head back down to the kitchens and into the Entrance Hall (#6 on the kitchen minimap).
Like the rest of the Castle, the Entrance Hall is in rough shape. Most of the hallways and a number of rooms have collapsed. There's not much to see here, just pick one of the exits and head out into the courtyard.
The Courtyard[]
Make your way north west toward the stables (#3) and continue west until you reach the north west corner of the map (#4). If you're on the south side of the pond, walk around it to the north side. Three cloaked Dhorn agents will approach you. Don't worry about a fight, they've been trying to find Simon and are here to escort him safely out of the city. One of the men identifies himself as Commander Klennard, someone Simon is apparently familiar with. They let Simon know that his belongings have been taken back to the hunting lodge and then hand over your clothes and weapons. During the conversation you learn that Simon is the fourth son of the Emperor of Dhorn. The men been trying to erase all evidence of his involvement in the robbery of the vault. Lord Mortenson's body has been burned and his men have been taken care of, Arto Benthur has apparently been persuaded to say that local thieves were responsible for the attempted heist, and Jero and Alen are to be revived by a High Cleric. Arto has asked that you be brought in so you and he can marry, which he believes will help restore some order to Betancuria. This isn't something you're interested in and Simon will persuade the men that they haven't seen any Princess and that you're free to go. After the three men leave, Simon says his goodbyes and follows suit. You can exit the courtyard using a ladder on the north side of the wall (#5).
The resolution[]
Once outside the Castle walls, you'll find yourself on the other side of the moat. Make your way west and exit the map. Alfons and the rest of your party will immediately greet you and say that they've been looking for you for days. After you fill them in on the details and Master Nathan's whereabouts, you'll be taken to the nearby ruined house where many of the remaining family members have gathered for a meeting.
| This article is part of a collection for the walkthrough for Part One. The previous article is Welcome Home. The next article is The Schism. |