| This article is part of a collection for the walkthrough for Part Two. The previous article is Chapter 2. The next article is Chapter 4. |

This part of the journey begins as the Princess regains consciousness, following her decision to jump over the waterfall in the Abandoned Mine. Most party members are severely injured, some may be dead, and others may go missing. After this rude awakening, the Princess is about to get full serving of the perils within Underdark, as she attempts to navigate to Dhorn territory.
| Spoiler: If Pia, Norah, or Gemli are in the party, they will all go missing at the start and only Pia can be recovered. The Princess will again be separated from her party following their capture and her enslavement to a Drow House in Maeralssin. The Princess must escape from Maeralssin and can rescue Pia and Bran. Vico may appear later in the Northern Tunnels and/or the Planes, depending on the nature of the Princess' relationship with Vico and her actions in the Maeralssin Pit. |
Walkthrough[]
|

Underdark[]
The underground river
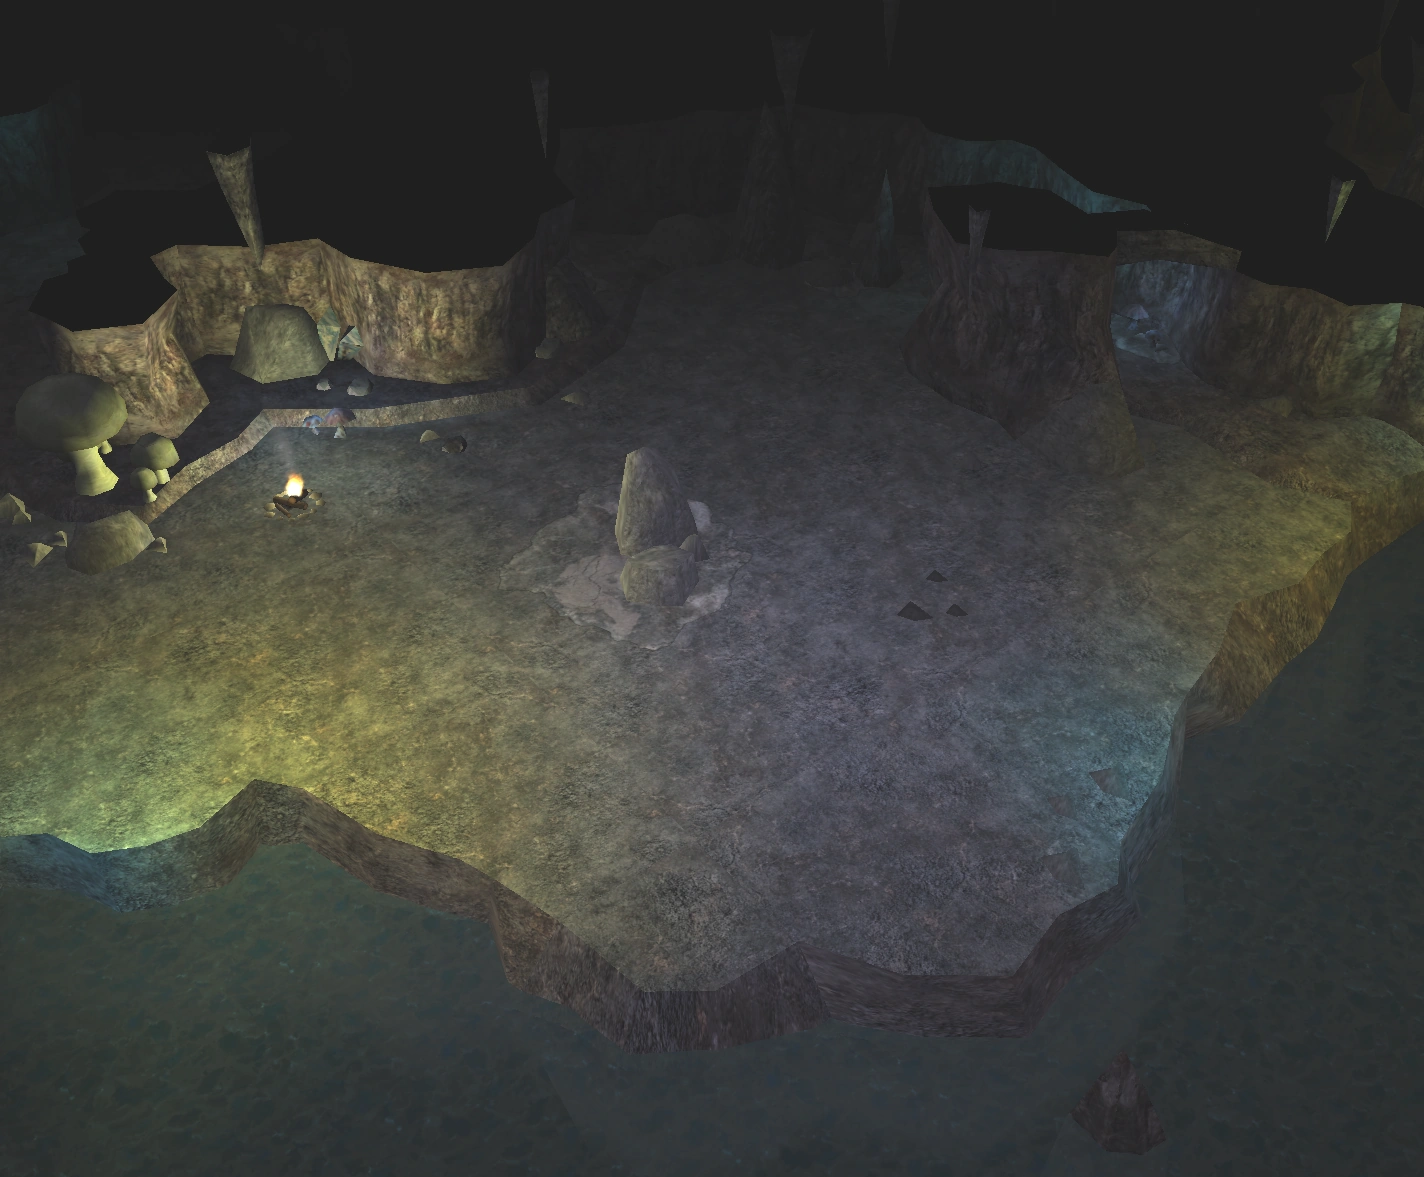
After going over the waterfall in the Abandoned Mine, you'll find yourself in the Underground River and a few party members short. Remaining party members will need healing and Anden will need to be resurrected. If Pia, Bran, or Gemli are in your party, they'll be missing.
Speak with your party, then rest at the campfire. Now head to the caverns beyond and make your way west, then down the hill and across the trapped bridge. Destroy the boulder blocking the cave and continue east once on the other side. Kobolds will ambush you, so just butcher them all. Continue into the cave and into the next area. Continue past the fortified bridge guarded by Kobolds and into the cave, where you'll encounter a minor Kobold resistance. You're now facing two paths. To the left, a passage leading further into the Underdark, and the main quest. To the right, an obstructed path requiring explosives that leads into a fortified Kobold structure, and Pia. If she was in your group, you'll want to head this way to pick her up. See Where's Pia? below for details.
After taking the unobstructed left passage in the cave guarded by Kobolds, you'll find yourself in the Underdark Tunnels.
Anden[]
If you're trying to romance Anden, or just looking for some fun, it's possible to catch him at a point of weakness when resting just after the waterfall. You can take advantage of him, but he will be very upset after.
Where's Pia?[]
After you've lost some party members over the waterfall, you'll need to head to the next area and make your way around the map in a westward direction. A fortified bridge leads into a small cave that's guarded by a small number of Kobolds. You can rescue Pia by clearing the path to the right with explosives, then continuing into the lower levels of the Kobold fortification, where Pia is being held. She'll be naked and missing her equipment. Speak with her, give her some gear, then continue further into the compound. You'll meet heavy Kobold resistance on the upper level, as well as their king. Pia's belongings can be found in a cabinet in the throne room. There's also an Elite Assassin's Garb and some Adamantite armor in the adjacent bedroom. Take the equipment, then return to the cave with the (previously cleared) obstructed right passage. Now take the left passage down and deeper into the Underdark.
Underdark Tunnels[]


Tiff wandering around in Rugnar's Realm
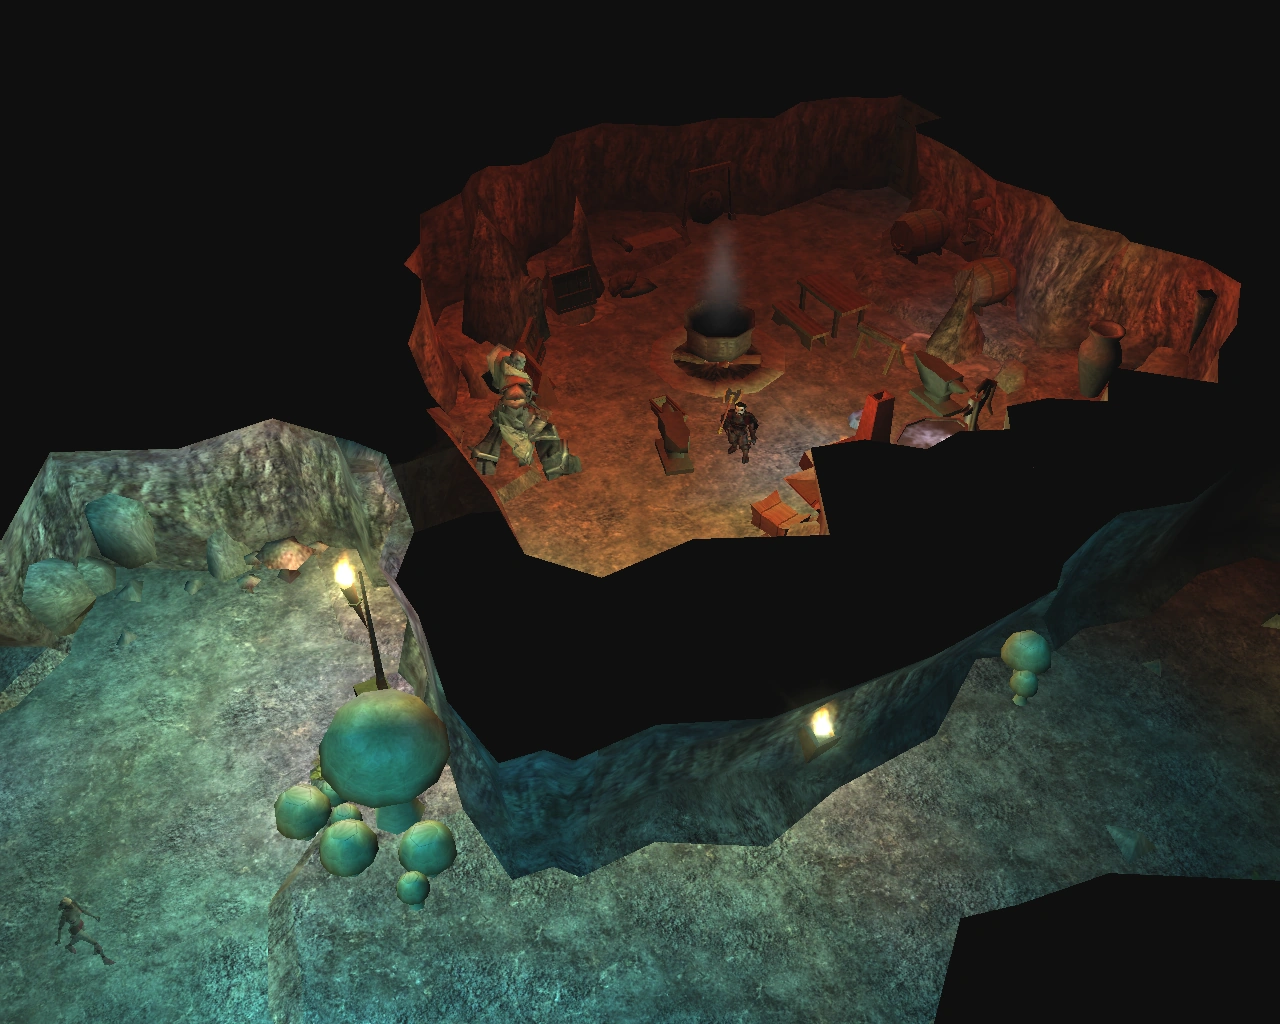
As you make your way through the Underdark Tunnels, you'll come across a sign welcoming you to Rugnar's Realm. Rugnar runs a small store and can enhance your weapons and armor.
This is the moment for you to spend all your hard earned money. Enhance your best armor and wepons, sell what is useless and buy everything you think you need. Add at least regeneration to your armor and buy the enhanced crossbow. If there's still cash left, buy something you can easily carry and sell later, for you may retrieve your belongins later, but the coins you don't spend here will soon be lost for good. (Unless, for no apparent reason, you drop all your coins in the entry hall of Rual'Thor's home, in which case you can retrieve them later.)
You will also find a "mindless" dark elf called Tiff living with Rugnar. You may rest at the campfire just outside his home. If you're in a relationship with Bran, you can crawl into his sleeping bag, but nothing more, as you will be on "that period of the month". When you're done, return to the main passage and head south. Upon entering the next area, you'll be greeted by a small band of hostile Kobolds. Kill them and continue across the bridge. The main quest lies through the nearest cave ahead, while the caves to the north can lead you to Gemli (what's left of him), if he was in your party.
| Tip: If Vico is in your party, he will suggest you fight the Rugnar's Huge Iron Golem. It is a real tough battle, and later when you return, there will be no one to trade with, so probably not a good idea. On the other hand, if you manage to defeat both Rugnar and his golem, you can loot his body for two copies of your best armor. For example, if you chose to wear the Red Dragon Platemail or the Armor of Lloth and added all enhancements to it, at the end you'll have two exact copies of it, so your henchmen can be equally protected. There's also the possibility of doing this later, though the party might not be exactly the same. Of course, this is just an optional battle. |
Underdark Tunnels, Battlegrounds[]
An alter on the battlegrounds
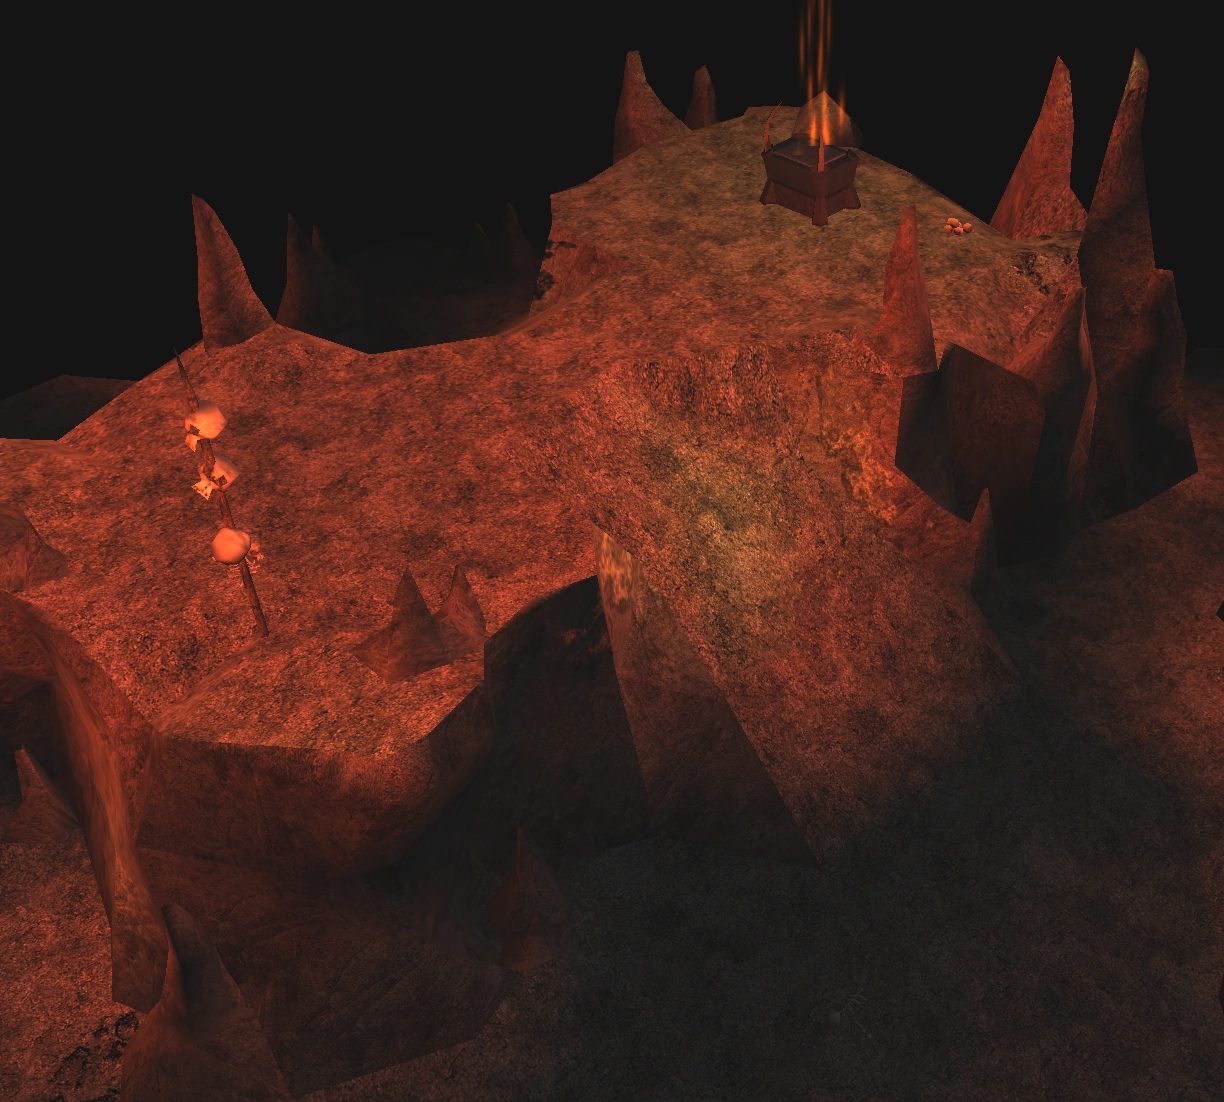
Enter the western cave and continue into the area, where you'll get the feeling that you're not alone. A small group of Drow lies ahead, so be prepared for a tough fight. There is one outcome at this stage of the game, but two ways to get there. The first is to be defeated by the Drow, taken captive, then sold off as a slave. The second is to defeat the Drow and move on to the battlegrounds, where you'll face a skeletal dragon and a hundred well-armed skeletons, then enter Rual'thor's home where you'll find and use a device, end up frozen, then sold off as a slave. Defeat by the Drow is the quickest path, but you'll get more experience, gear, and a few more conversations with your party if you manage to make it through the battlegrounds. If you make it to the battlegrounds and defeat the skeletal dragon, take its skull and place it on the statue. This will open the door and allow you through to the next map, where you'll find Rual'Thor's home and the device that ultimately seals your fate, sending you to Maeralssin.
| Tip: Defeating the skeletons is not so difficult, but it can be a bit tedious. If you have the Chainmail of Doom, equip it along with a fire-protective gear, then head alone to face them, always aiming at the skeletal mages first, the armor itself will do the rest quickly. When the skeletal dragon appears, call for your henchmen, and make sure you have some Belts of the Brave equipped to avoid fear. This is a tough one, but the fire weapons seem to be the more effective against it. Try to hit it from afar, whenever possible. |
Where's Gemli?[]
Once you've made it to the Underdark Tunnels, you can complete the Where's Gemli? quest. Continue west across the bridge, then go through the northern caves. You'll find yourself on the other side of the Underground River, along with a few Intellect Devourers and Gemli's remains. Take any equipment you need, then return to the bridge and head through the cave just a bit to the west.
Maeralssin[]

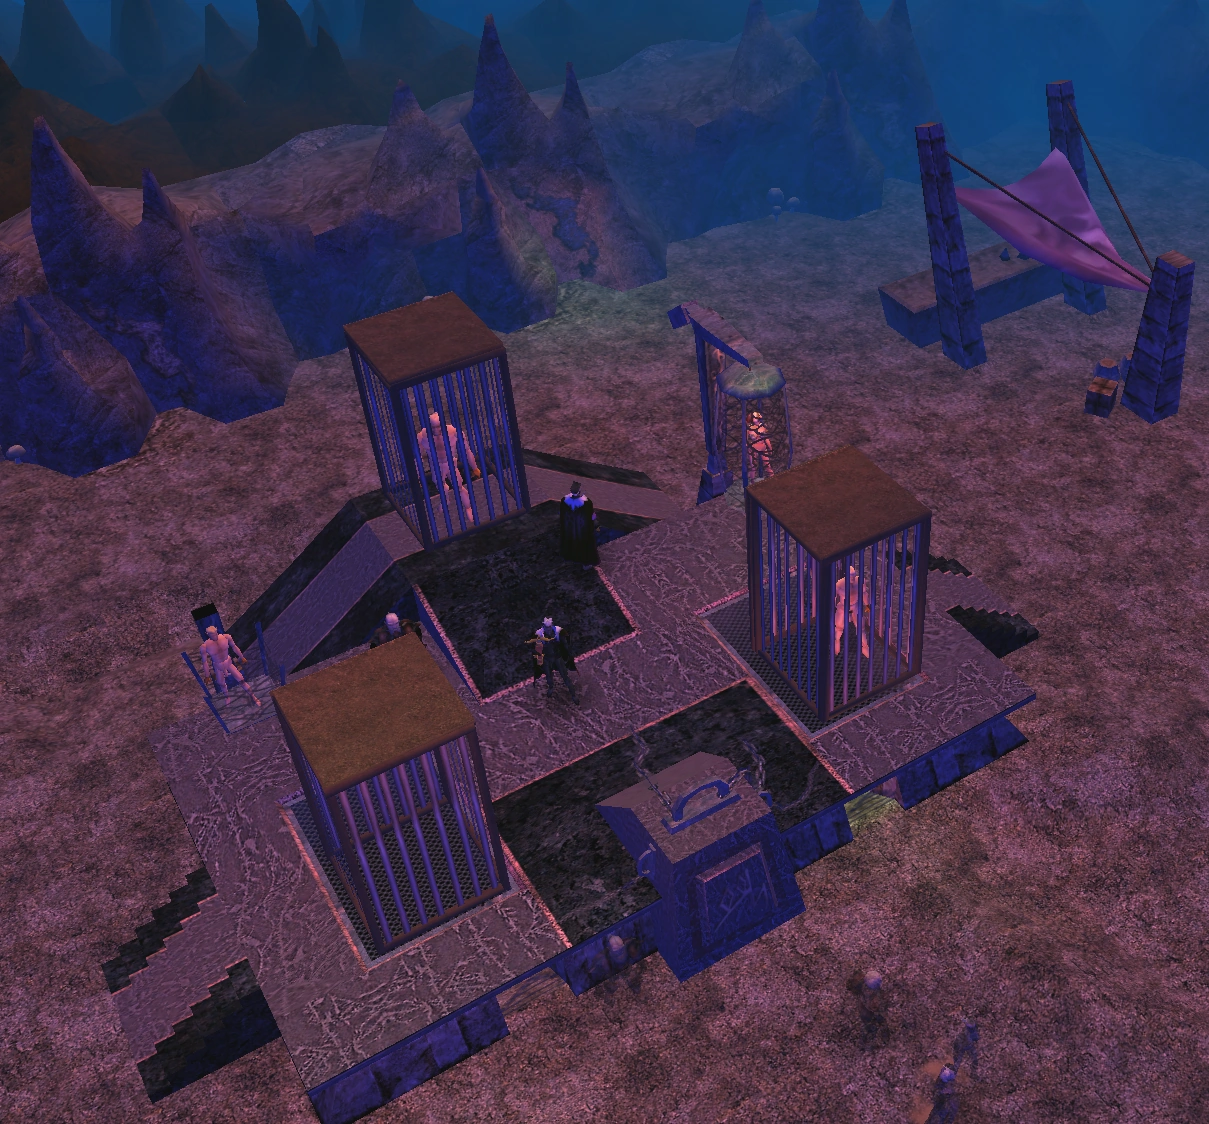
Slaves in the market
Following your defeat or capture in Underdark, a cut scene with the Matron of House Pharn will play out and you'll be sent to die at the hands of a Gray Render in the House dungeon. The Render can be easily defeated by moving toward the the doors, waiting for it to approach, then using the switch as it crosses. The doors will shut, killing the Render immediately. A brief cut scene will play where you're deemed too troublesome to keep and House Pharn decides to put you up for sale in the Maeralssin Market.
Maeralssin Market[]
After the events in House Pharn, you're put up for sale in the Maeralssin Market. A number of perspective buyers show interest, including a Dwarf and Mindflayer, but it's Rizzen Do'Vrinn who eventually acquires, albeit at a reduced price thanks to his menacing demeanor and status in the powerful House Do'Vrinn. Following your purchase, you'll find yourself in a cell in the basement of House Do'Vrinn.
House Do'Vrinn[]

House Do'Vrinn Basement
Rizzen and his sister, Talice, as well as the cellmaster and a few guards will visit your cell. Rest between each conversation. After a few, you'll be forced to fight an Orc to gauge your possible value as a fighter for House Do'Vrinn. Once the Orc has been dispatched, the cellmaster will stop the fight and you'll be returned to your cell. Next, you'll be taken to a large arena and asked to fight the Black Knight of Noqut'Tar, a recently acquired and undefeated warrior for House Noqut'Tar, better known to you as Vico. After a quick conversation, a Do'Vrinn houseguard will approach, hand you your outfit and the fight will begin. Once Vico has been defeated, an announcement of your victory is made. You'll notice that Vico isn't actually dead, just feigning death. You have the option to leave him be, let the arena master know, or finish him off yourself. If you were both having an affair, you'll meet up later in the Northern Tunnels. If not, you'll only see him again in the Planes.

Following your victory in the arena, you'll be taken to an interrogation room in House Do'Vrinn. Lying and refusing to answer will result in you being killed and module finishing. No magical rescues here.
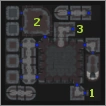
Answer their questions, you will be returned to your cell. Rizzen should stop by for one final conversation before the house is stormed by House Noqut'Tar warriors. After Rizzen single-handedly defeats a large group, he'll accidentally drop the key to your cell before rushing upstairs. Take the key, unlock your cell (#1), then head out. You'll be naked and weaponless, so it's time to enable stealth mode. Head north, past a number of other cells, then enter a small locked room (#2) and through a secret door on the west wall. Beyond the next room is a Bone Golem. Sneak past and into the room, then head up the stairs (#3).
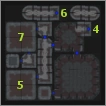
After making it to the upper levels of the House (#4), you'll find groups of House Do'Vrinn and Noqut'Tar warriors fighting, which you should have no problem avoiding using stealth. The second and third floors of the House can be fully explored and with a high enough lock pick, completely looted. There are a number of useful weapons and items to be had (especially the Greater Gloves of the Rogue). Head south through the hidden door, then unlock the main door to the hallway and continue south until you reach the stairs up (#5). Continue up to the third level (#6), then note the first doorway on your right. This is the way to the Chapel, but you'll need to grab a key first. Continue down the hallway and pick the lock on the first door on your left. Look for the hidden door on the west wall. Move into the next room, then unlock the chest on the south wall (#7) and take the Matron's key. Head back the way you came and unlock the door leading to the Chapel, then enter the portal (#8).
Chapel[]
Once inside the Chapel, you'll notice members of House Do'Vrinn, including Matron Do'Vrinn and Rizzen being guarded by a number of House Noqut'Tar warriors. They're in a trance, under the spell of a Noqut'Tar priestess. You must destroy the mirror to break the trance, then let the Matron and Rizzen handle the hostiles. Once they're defeated, speak with Rizzen. The Matron will head into the house to take care of the invaders, leaving Rizzen with you. Rizzen, embarrassed by the situation, will join up with you and lead you out of the house and out of Maeralssin. A cut scene follows with Rizzen leading the way, then you're back in Underdark.
Underdark, after Maeralssin[]
After your escape from House Do'Vrinn, Rizzen will lead you through Maeralssin. Once outside the city, you'll have a brief conversation and you can suggest or he'll recommend heading back to Rual'Thor's home to pick up your gear. Continue away from Maeralssin until you see the Drow guards tending to their herd of Deep Rothe. The south east tunnels bring you to the Northern Tunnels and on your way through Underdark, while the south west passage leads back to Rual'Thor's home and your missing equipment. Additionally, you can explore the Duergar Mine found in the South part of the Underdark Tunnels, for some extra loot. Rizzen will first object to this leeway, but he will eventually comply and join you.
As you make your way to Rual'Thor's home, Rizzen will guide you through the caverns and hidden doors. Eventually, you'll cross paths with a Gror'Fthith and should attempt to sneak past. There is some nearby loot if you want to pick it up before leaving the map. The following area should have the entrance to Rual'Thor's home. Take care of the lock, then enter.
| Tip: If you kill Gror'Fthith instead of sneaking past him, you will get 1500XP. He is quite reasonable to deal with, especially if you have Rizzen and Vico with you. |
Return to Rual'Thor's Home[]
Rual'Thor's Home
After being led by Rizzen through Underdark to Rual'Thor's Home, you'll enter the exterior and find yourself on the upper level. Fight through the Minotaur's guarding the hallway, into the portal room, then enter the portal, which will put you in the main complex. Move down the hallway and continue west, past the door leading to the larger open area (containing the "mechanism"), to the bookshelf. Open the bookshelf and take the contents, inspecting any notes as they describe the locations of Pia and Bran, if either were in your party when captured.
Now return to the main area and go through the north east door and take care of any guards. Open the door to Rual'Thor's room, then speak with him. Following the conversation, he'll attack with the help of four Minotaurs. Once the group has been dispatched, take the key from the black box in the corner of the room. Return to the main area and go through the north west door, which leads to your equipment. Take care of any remaining guards, then enter the room. Watch for traps on the floor and containers, then pick up your equipment.
Rescue Pia, Again[]
After you discover the whereabouts of Pia from the note found in Rual'Thor's Home, exit through front door of the main (lower) level and make your way back to Rugnar's Realm in the Underdark Tunnels. Cross the battlefield, through the Drow abush site and across the bridge. Continue east across another bridge, then into the tunnels near Rugnar's. As you approach, Tiff should become enraged and attack. Take care of her, then speak with Rugnar. If you deny killing her, you can persuade him to release Pia or buy her back. The other option is to fight for her release. Choose your path, then pick up her belongings from the chest in the back room.
Where's Bran?[]
If Bran was in your party when captured in Underdark and you were on track with his relationship, a note (possibly with Pia's) should be found in Rual'Thor's Home, documenting his sale to a family in Maeralssin.
| Note: If there is no note, you probably didn't advance Bran's relationship enough. See the Troubleshooting page for more information. |
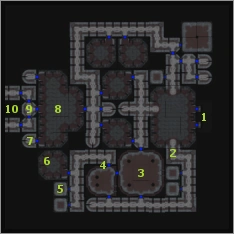
Exit Rual'Thor's home through the portal on the upper level, past the Gror'Fthith, and the Drow tending to their Deep Rothe. When you near the passage to Maeralssin, Rizzen will remain behind. Enable stealth mode, then enter the city. Head east from the caves for a short distance, then turn left and make your way to the north west. The Rilynett Mansion is in the far north west corner of the map. Take care of the door, then enter. The mansion is heavily guarded by members of the house and slaves, so you will need to remain stealthy for now.
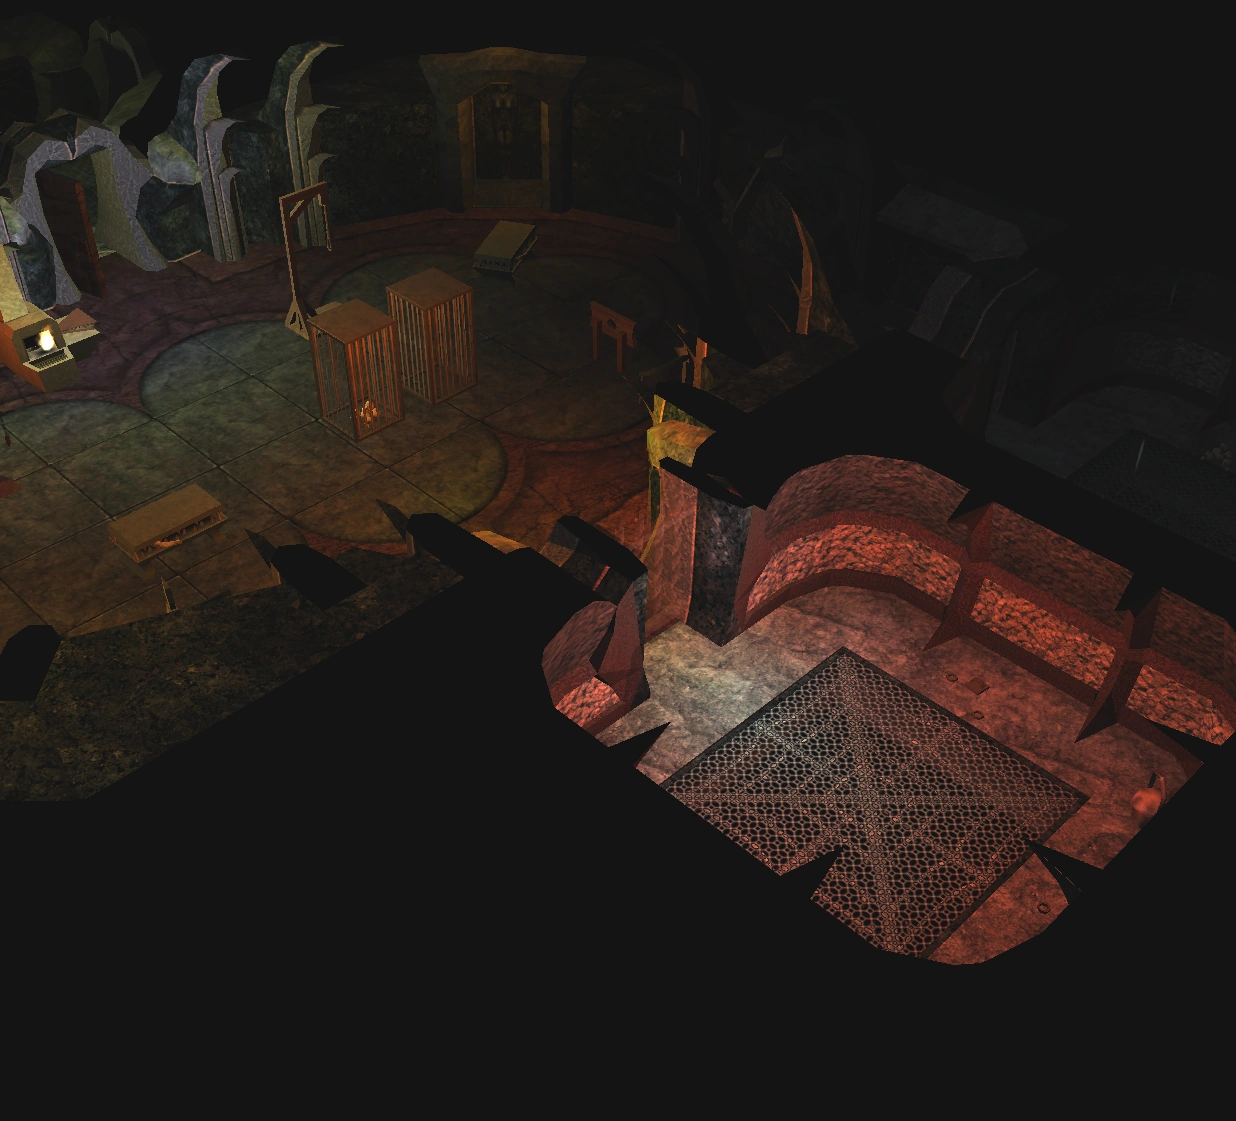
Hatchril Rilynett can be found patrolling the main chamber on the ground floor. To the north west is a large room (#2) that's used for holding and torturing prisoners. A Dhorn lieutenant ("Lieutenant Becks, Third Squadron, Special Forces of the Dhorn Empire") is being held in a small locked room. With a high persuasion check (12 or better), you can learn that his squadron was in pursuit of an escaped fugitive when they were ambushed by the Drow in Underdark. The lieutenant woke up in the mansion after being wounded in battle. You can offer to help him escape, but he won't accept. If you're not careful with your actions and dialog, the lieutenant may attack. Remember this room as you'll be returning shortly. If you feel like doing some looting, Barinid Rilynett can be found in a nearby room with a weapon rack and a locked chest.


The torture chamber
Head upstairs (#3), sneak past Urlaghar, and go through the door on the western wall. The door is unlocked, but trapped. Once through the door you'll see a room (#7) being guarded by a Slaad, which is where Bran is being held, but you cannot enter through the front. Head south down the hallway and open the door. Upon entering (#5), Alyafein and Chalafein Rilynett will request you speak with them. Alyafein believes you are after Ulviirerd and no amount of convincing will sway her otherwise, but this is unimportant. She tells you that Ulviirerd's room is protected by magic and the only way in is to use the secret passage found in the "entertainment room" (the torture chamber on the ground floor). Head back downstairs (#4) and into the torture chamber (#2), then walk toward the eastern wall. A hidden wall door should appear momentarily. Step through when it does, then head upstairs.
Now in the secret passage on the upper floor (#6), walk down the hallway and keep an eye open for the hidden door on the south wall. When it appears, step through and move toward the middle of the room (#7), where a dark shape will subdue you from behind. You'll pass out and wake moments later, and face an uncertain Bran. After convincing him that it's really you, he'll explain what happened and join up with you. You should heal up and prep for battle before leaving through the hidden door, as Alyafein and Chalafein will ambush you with a number of slaves. When the group is defeated, you're free to exit the mansion. Sneak out of the house, through Maeralssin, then exit the city and rejoin with Rizzen.
Northern Tunnels[]
Now that you've made it out of Maeralssin, joined up with Rizzen, and rescued your missing party members, you can finally get back on track with the main quest. If you haven't rescued any party members yet, you should return to Underdark and try to find them before continuing any further. At most, you'll be able to rescue Bran and Pia. Depending on your actions in Maeralssin, it's possible for Vico to be in the tunnels to greet you. Read the note below for more information.
Make your way through the Northern Tunnels until you find a group of dead Drow and a dead Drider. Head to the southern wall and look for a hidden door. Go through the door and fight the Drider Warrior. Once defeated, search the body of the dead Drow guard for a key. If the body doesn't have any items, the key can be spawned with the "dm_spawnitem drowgatekey" debug mode command. Take the key and return through the hidden door to the main area. Upon exiting from the door, a random group of Drow should ambush you. When they've been defeated, unlock the door to the north and continue into Underdark.
| Tip: The size of the ambush is random, varying between one and eight Drows. |
| Note: If you and Vico were lovers and you let him live after your fight in the Maeralssin Pit, he should step out of the shadows in the Northern Tunnels and greet you. Rizzen doesn't like very much the prospect of having another dominant male joining the party and demands that you leave Vico behind. This is your chance to pick a side and kill Vico/Rizzen or persuade them to work together. |
Beyond the Northern Tunnels[]
Now that you've regrouped and made through the Northern Tunnels, you're finally making some real progress on the journey through Underdark.
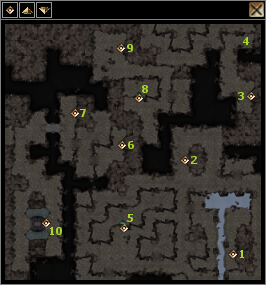
There are a number of cave-like passages scattered across this map that lead to the different areas. Use the nearest passage toward the north east (#2), then make your way around to the Orcs (#4) and kill them. Take the key from the Half-Orc and return through the passage (#3). Continue through the south west passage (#5), over the hill defended by a number of Kobold, across the bridge, then south west toward the Ancient City Gates (#10).
Before leaving, you may wish to explore the small tomb (#9) in the north west quadrant of the map. It's not required, but there is a large number of spells and other items within. You'll need a high dexterity or a good set of lock pick tools to get in. Take the cave passage (#7) just to the north of the Ancient City Gates to get there.
Ancient City Gates[]
The Ancient City Gates have become somewhat inaccessible over the years due to a large number of cave ins. Upon entering (#1), you'll face a small group of goblins. Turn south and break through the spider webs (#2). Continue down the hallway, killing the Spiders as you encounter them. The next area has a few spiders as well as a Deepcave Spiderqueen in the adjacent room (#3). Break through the door (#4) and continue down the hallway in a south west direction. You'll come to a doorway blocked off by some boulders and two small rooms, one with a locked door. Open the door (#5), kill the Bodak, then enter the hidden door on the north wall. There will be another hidden door on the west side of the circular room (#6). You're now in a small room (#7) leading to a larger open area (#8). Beyond the door is a large number of Orcs and some goblins. You can leave your party behind and sneak past them, or fight your way through. Use the switch on the pillar (#9) and exit through one of the two doors (#10), which lead to the Mushroom Grove.
Mushroom Grove and beyond[]
After making your way through the Ancient City Gates, you'll find yourself in the Mushroom Grove. You're almost in the clear, but there's a large Drow ambush a head, so be ready. The attack party is lead by Rizzen's sister. They will attack from the surrounding hillsides, the front, and the back. When they have been defeated, exit to the tunnels.
A brief conversation will follow the new area, signaling the end of Underdark. A quick and uneventful walk will take you across the bridge and leads to the exit to the Forest outside of the Lake of Sorrow, and Chapter 4.
| This article is part of a collection for the walkthrough for Part Two. The previous article is Chapter 2. The next article is Chapter 4. |